How to make a gyrocopter at home: If you’re fascinated by aviation and have a passion for DIY projects, you might be considering building a gyrocopter at home.
Good news: It’s possible! In this comprehensive guide, you’ll find step-by-step instructions on building your own gyrocopter from scratch.
Contents
How to Make a Gyrocopter at Home
Before you delve into the construction process, it’s important to have a basic understanding of what a gyrocopter is and how it functions.
You’ll learn about the key components and principles behind gyrocopter design, providing you with a solid foundation to build upon.
Next, you’ll gather the necessary materials and tools for your homemade gyrocopter and create the design that suits your needs and specifications.
From there, you’ll construct the frame of the gyrocopter, install the engine and propeller, and build the rotor system and control systems. Of course, safety is a top priority when building and flying a homemade gyrocopter.
We’ll provide you with essential safety considerations and tips, as well as guidance on testing your gyrocopter before taking it for its maiden flight.
Finally, you’ll learn about troubleshooting and maintenance to keep your homemade gyrocopter in optimal condition.
Key Takeaways:
- Building a gyrocopter at home is possible with the right knowledge and guidance.
- A basic understanding of gyrocopter components and principles is important before starting the construction process.
- Gathering the necessary materials and tools is essential for building a homemade gyrocopter.
- Safety should always be a top priority when building and flying a homemade gyrocopter.
- Regular maintenance and troubleshooting are key to keeping your homemade gyrocopter in optimal condition.
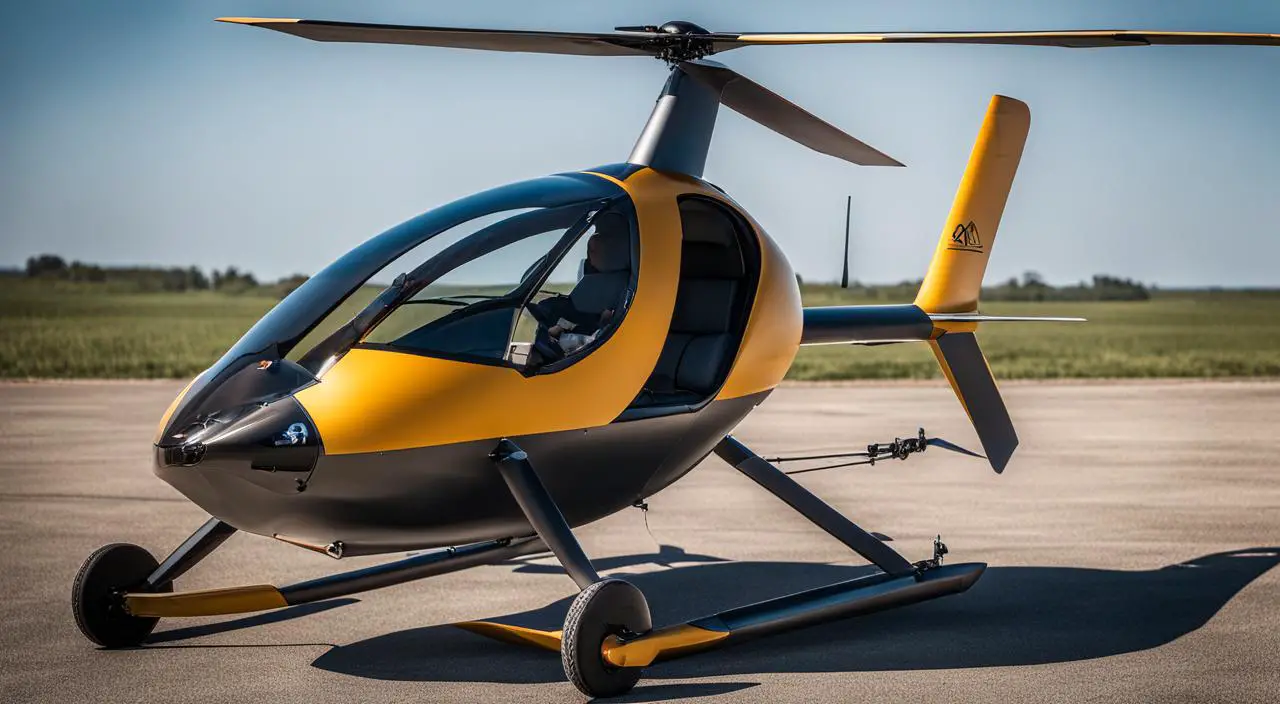
Understanding the Basics of a Gyrocopter

A gyrocopter, also known as an autogyro, is a type of aircraft that uses a rotor to generate lift and an engine-powered propeller to provide thrust.
Unlike a helicopter, the rotor of a gyrocopter is not powered by the engine but is instead set in motion by the force of the air rushing upwards as the gyrocopter moves forward.
Gyrocopters are often classified as rotorcraft, which also includes helicopters. However, gyrocopters differ from helicopters in that they do not have a tail rotor or a swashplate mechanism.
This makes them simpler and less expensive to construct and maintain. The basic design of a gyrocopter consists of a rotor blade mounted above the cockpit with a mast.
While a horizontal stabilizer with a tail rotor helps to maintain stability during flight. The engine and propeller are positioned to provide forward thrust, while the rotor generates lift.
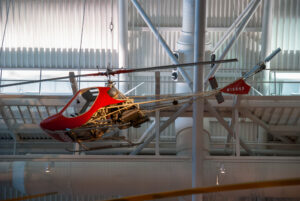
Gyrocopter Construction
Constructing a gyrocopter involves several key components such as the rotor, engine, and frame. The rotor, for instance, is made up of blades that are attached to the rotor hub, which is connected to a mast.
The blades are free to spin around their own axis, making them effective in generating lift. The engine is typically placed at the rear of the gyrocopter, while the propeller is attached at the front.
The frame of the gyrocopter provides the necessary structure and stability to support the rest of the components.
One of the main advantages of building a homemade gyrocopter is the ability to customize the design according to personal preferences.
This allows for more flexibility and adaptability compared to commercially manufactured gyrocopters.
| Gyrocopter Design | Helicopter Design |
|---|---|
| Small size | Large size |
| Lower cost | Higher cost |
| Less complex construction | More complex construction |
Overall, understanding the basics of gyrocopter construction and design is crucial to building a functional and safe homemade aircraft.
With this foundation in place, it is possible to embark on the exciting and challenging journey of building your own gyrocopter from scratch.
Gathering the Necessary Materials and Tools

Before starting the construction process of your homemade gyrocopter, it’s essential to gather all the required materials and tools.
Here is a list of the items you’ll need:
| Materials | Tools |
|---|---|
| Aluminum tubing or steel framework | Welding equipment |
| Engine | Metal saw |
| Propeller | Drill and bits |
| Rotor blades | Socket set and wrenches |
| Control systems | Wiring and electrical components |
| Instrument panel | General hand tools (screwdrivers, pliers, etc.) |
When purchasing materials for your gyrocopter, ensure that they are of high quality and meet the specifications required for your homemade gyrocopter.
You can refer to homemade gyrocopter plans or kits for guidance on what materials to use.
It’s also important to have some gyrocopter construction tips in mind before starting the build. Here are a few:
- Double-check measurements before cutting or welding any components.
- Ensure all connections and joints are secure and properly welded.
- Take your time during assembly to avoid mistakes or errors.
- Don’t rush the process. Building a gyrocopter takes time and patience.
With these materials and tips in mind, you’ll be ready to move on to the next step of creating your gyrocopter design.
Creating the Gyrocopter Design

Before building a gyrocopter from scratch, builders must understand its design.
A gyrocopter is characterized by a rotor system that provides lift instead of the traditional fixed-wing typical of airplanes or the spinning rotors of a helicopter.
The rotor system of a gyrocopter must be made to be as light as possible to maximize lift while minimizing drag. The rotor system consists of a mast, rotors, hub, and pre-rotator system.
The rotors are typically made of aluminum, while the pre-rotator is made of steel or aluminum to withstand the high rotational speeds required for takeoff and flight.
Designers must pay attention to the number of blades, their shape, size, and rotational speed to achieve maximum lift.
The gyrocopter’s fuselage, or body, supports the engine, rotor system, and control systems and should be designed to minimize drag.
Gyrocopters come in various configurations depending on the designer’s needs. Some common configurations include open frame, enclosed cabin, and tandem seating.
When designing the gyrocopter, designers must ensure that it meets FAA regulations. The design must be safe, airworthy, meet structural requirements, and have sufficient control systems.
Designing Your Homebuilt Gyrocopter
Designing a homebuilt gyrocopter requires careful consideration of many factors, including weight, balance, and aerodynamics.
Builders must know the basics of gyrocopter construction before designing their aircraft. Builders can either use pre-existing gyrocopter designs or design one based on their specifications.
When designing a gyrocopter, builders must consider the following:
- Maximum weight of the aircraft
- Balancing the aircraft
- Rotational speed of the rotor system
- Engine power and size
- Number of seats
- Fuel capacity
Using computer-aided design (CAD) software can help with the design process. CAD software allows builders to test different designs and configurations before starting construction.
Once the design is complete, the builder can move to the construction phase of the gyrocopter.
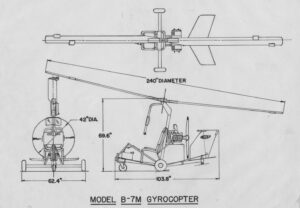
Constructing the Gyrocopter Frame

The frame of a homemade gyrocopter serves as the backbone of the aircraft, providing structural support and stability.
Building a sturdy and lightweight frame is crucial for a safe and successful flight. Here’s a step-by-step guide on constructing the gyrocopter frame:
- Choose the right material: The frame of a gyrocopter can be made of various materials, including aluminum, steel, or titanium. Aluminum is the most popular choice due to its lightweight and corrosion-resistant properties.
- Acquire the necessary tools: To construct the frame, you’ll need a variety of tools, including a saw, drill, welder, and measuring tools. Ensure that you have all the necessary tools before proceeding.
- Measure and cut: Use the measurements and dimensions from your gyrocopter blueprints to cut the aluminum tubing to the correct size. The tubing will form the structure of the frame.
- Weld the frame: Once you have all the tubing cut, the next step is to weld the frame together. Use the welder to join the individual pieces of tubing together, creating the overall frame structure.
- Attach landing gear: The landing gear supports the gyrocopter during takeoff and landing. Weld the landing gear to the frame, ensuring it is secure and level.
- Install braces: To add extra stability to the frame, install braces between the tubing. Use a saw or tubing notcher to create angled cuts in the tubing and weld the braces in place.
- Add the seat: The seat attaches to the frame and provides a comfortable sitting position for the pilot. Weld the seat bracket to the frame and attach the seat.
Remember to take your time during the construction process and double-check all measurements and welds for accuracy and safety.
When complete, the gyrocopter frame should be sturdy, lightweight, and well-balanced, ensuring a smooth flight.
Installing the Engine and Propeller

After designing the frame of the gyrocopter, the next step is to install the engine and propeller.
The engine and propeller are vital components responsible for providing the necessary thrust to lift the gyrocopter off the ground and propel it through the air.
The first step in installing the engine is to select the appropriate engine for your homemade gyrocopter. Factors to consider when selecting an engine include weight, power output, and fuel efficiency.
Once you have selected the engine, follow the manufacturer’s instructions carefully to install it properly. After installing the engine, the next step is to attach the propeller.
The propeller is responsible for converting the engine’s rotary motion into a forward thrust that propels the gyrocopter forward.
You will need to carefully select a propeller based on your engine’s power output and the weight of your gyrocopter. When attaching the propeller, be sure to follow the manufacturer’s instructions carefully.
The propeller must be carefully balanced to ensure smooth operation and prevent excessive vibration, which can lead to structural damage.
DIY Gyrocopter Plans
If you are building a gyrocopter from scratch, it is recommended that you use DIY gyrocopter plans to guide you through the process.
There are a variety of DIY gyrocopter plans available online that can help you build a safe and reliable homemade gyrocopter.
When selecting DIY gyrocopter plans, be sure to choose plans that are designed for your skill level and budget. Some plans may require advanced welding skills or specialized tools, while others may be more beginner-friendly.
Homemade Gyrocopter Tutorial
A homemade gyrocopter tutorial can provide you with step-by-step instructions on how to install the engine and propeller, as well as other key components of your gyrocopter.
A tutorial can help ensure that you install the engine and propeller correctly and avoid costly mistakes.
When following a homemade gyrocopter tutorial, be sure to follow the instructions carefully and double-check your work before moving on to the next step.
It is also recommended that you seek the advice of an experienced builder or aviation expert if you have any questions or concerns.
“A gyrocopter flies in the sky like a bird, but it’s not a bird. It’s an aircraft, and you must treat it like one.” – Igor Bensen
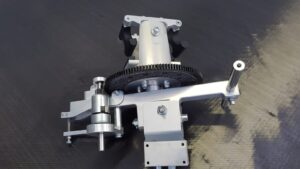
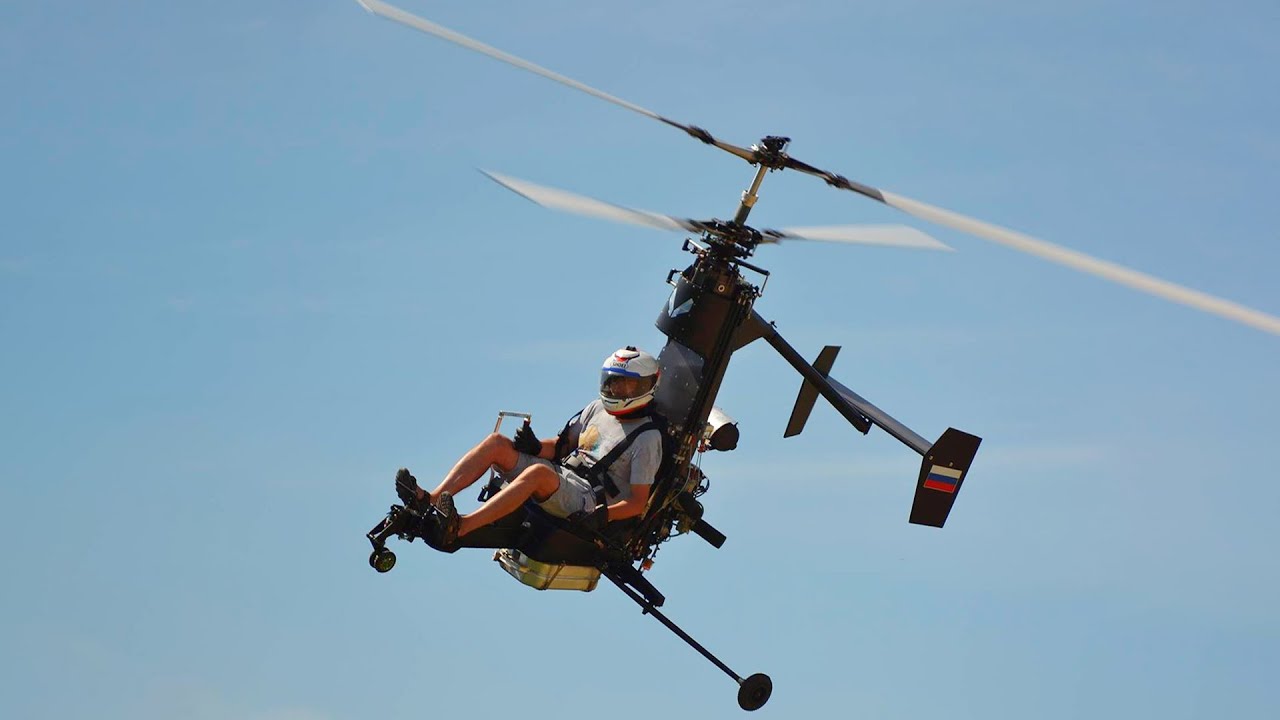
Building the Rotor System

The rotor system is one of the most crucial components of a gyrocopter, as it provides lift and stability during flight.
Building a rotor system for your homemade gyrocopter can be a complex process, but with the right guidance, it is achievable. There are several types of rotors to choose from, including teetering, semi-rigid, and fully articulated.
Each type has its own benefits and drawbacks, so it is important to carefully consider which option will work best for your gyrocopter design.
If you’re unsure about which type of rotor system to use, a semi-rigid rotor is a good choice for beginners. It is easy to construct and maintain, while still providing good stability and control in flight.
| Type of Rotor | Benefits | Drawbacks |
|---|---|---|
| Teetering | Low cost, simple design | Less stable in flight, less control |
| Semi-rigid | Easy to construct and maintain, good stability and control | Less maneuverable |
| Fully articulated | Maximum maneuverability and control | Expensive, complex design, requires frequent maintenance |
Once you have chosen the type of rotor system to use, it’s time to begin construction. The first step is to create the rotor blades.
This can be done using a variety of materials, including wood, fiberglass, or aluminum. Next, you will need to construct the rotor hub, which connects the blades to the rest of the gyrocopter.
The hub should be strong and durable, as it will be under a lot of stress during flight. Finally, you will need to install the rotor head and control system.
This allows you to control the pitch and direction of the rotor blades during flight.
It is important to ensure that the rotor system is properly balanced and aligned, as any imbalances can lead to instability and potential safety hazards.
For a more detailed guide on building your own rotor system, check out this DIY gyrocopter assembly guide.
With some patience and attention to detail, you can successfully construct a high-quality rotor system for your homemade gyrocopter.
Installing Control Systems

Once the frame and engine of your homemade gyrocopter are in place, it’s time to move on to installing the control systems.
The control systems are essential for maneuvering your gyrocopter in the air and ensuring a safe and enjoyable flight.
Before getting started, gather all of the necessary materials and tools. This includes the control surfaces (rudder, elevator, ailerons), control cables, pulleys, and hardware.
Begin by attaching the control surfaces to the tail and wings of the gyrocopter. Use a hinge or pivot point to ensure that the control surfaces can move freely.
Next, install the control cables and pulleys. Make sure to measure and cut the cables to the appropriate length. Attach the cables to the control surfaces and route them through the appropriate pulleys.
Secure the cables and pulleys to the frame of the gyrocopter. Once the control cables and pulleys are in place, test the control systems to ensure proper functionality.
Move the control surfaces back and forth to ensure that they move smoothly and freely. Finally, make any necessary adjustments to the control systems to ensure that they operate effectively.
This may involve adjusting the tension of the control cables or the position of the control surfaces.
“Building control systems for a homemade gyrocopter can be a challenging and rewarding task. Take your time and ensure that everything is installed properly to ensure a safe and enjoyable flight.”
Installing Control Systems
Now that the frame, engine, rotor system, and electrical wiring have been set up, it’s time to install the control systems.
The control surfaces of a gyrocopter, including the rudder, elevator, and ailerons, enable the pilot to maneuver the aircraft in the air. Installing these control systems is crucial for the safe operation of your homemade gyrocopter.
Before you begin the installation process, it’s important to have a clear understanding of how the control surfaces work. The rudder controls the yaw of the gyrocopter, which refers to the left and right movement of the aircraft.
The elevator controls the pitch, which refers to the up and down movement, and the ailerons control the roll, which refers to the tilting of the aircraft from side to side.
When installing the control systems, it’s important to ensure that they are properly aligned and securely attached to the frame.
Any misalignment or looseness can cause control issues and potentially lead to a dangerous situation in flight.
Homemade Gyrocopter Plans
When building a homemade gyrocopter, it’s important to follow a set of plans to ensure that you are installing the control systems correctly.
Many gyrocopter enthusiasts have created their own plans and tutorials, which can be found online or purchased. It’s important to select a set of plans that are well-reviewed and have been tested by other builders.
If you are designing your own gyrocopter from scratch, you will need to create detailed plans for the control systems.
This will involve calculating the dimensions and angles of the control surfaces, as well as determining the appropriate placement and attachment points for each component.
Homemade Gyrocopter Kit
If you have purchased a homemade gyrocopter kit, the control systems may already be included in the package. In this case, you will need to follow the instructions provided with the kit to properly install the control systems.
It’s important to note that not all homemade gyrocopter kits include control systems, so be sure to check what components are included before making a purchase.
Homemade Gyrocopter Parts
If you are sourcing your own parts for the control systems, it’s important to ensure that they are compatible with your gyrocopter design and meet all safety regulations.
This may involve consulting with an aviation expert or engineer to ensure that the parts you select are appropriate for your homemade gyrocopter.
Common components of the control systems include control sticks, pushrods, bell cranks, and cables.
These components should be made of high-quality materials and be properly sized for the weight and size of your gyrocopter.
DIY Gyrocopter Tutorial
If you are new to building a gyrocopter or have little experience with aircraft construction, it may be helpful to consult with a tutorial or guide.
Many experienced builders have created tutorials that provide step-by-step instructions on installing the control systems, as well as other components of a homemade gyrocopter.
It’s important to follow the instructions carefully and ask for help if you are unsure about any step of the process. Safety should always be the top priority when building and flying a homemade gyrocopter.
“When installing the control systems, it’s important to ensure that they are properly aligned and securely attached to the frame.”
Safety Considerations and Testing

When it comes to building a homemade gyrocopter project, safety should always be a top priority. Before taking your gyrocopter for its maiden flight.
It’s essential to run through a safety checklist and perform thorough testing. Here are some key safety considerations and testing procedures to follow:
Safety Considerations
- Ensure that your gyrocopter is structurally sound and all components are secure.
- Check that your engine and electrical systems are functioning properly.
- Be aware of the weather conditions and avoid flying in high winds or thunderstorms.
- Remember to wear appropriate safety gear, including a helmet and harness.
- Always have an emergency plan in place and be prepared for unexpected situations.
By following these safety considerations, you will be minimizing the risk of accidents or injuries during the testing and flight of your homemade gyrocopter.
Testing Procedures
Before attempting your first flight, it’s important to conduct thorough testing to ensure that your homemade gyrocopter is performing at its best. Here are some essential testing procedures:
- Begin with a ground test to check the engine, rotor system, and control surfaces.
- Perform a taxi test to get a feel for steering and braking.
- Gradually increase altitude and speed, checking for any abnormal vibrations or noises.
- Test all control surfaces to ensure they are responsive and working correctly.
- Perform a hover test to check the stability and balance of your gyrocopter.
- Finally, perform a brief test flight, gradually increasing altitude and speed to get a feel for the flight characteristics of your gyrocopter.
By conducting these testing procedures, you will gain valuable insight into how your homemade gyrocopter performs and be able to identify any issues that need to be addressed before taking your gyrocopter for a full flight.
“Remember to prioritize safety and enjoy the process of creating your own gyrocopter from scratch.”
By following these safety considerations and testing procedures, you will be well on your way to building and flying your own homemade gyrocopter.
Always prioritize safety, and enjoy the thrill of seeing your creation take to the skies.
Troubleshooting and Maintenance

Like any aircraft, a homemade gyrocopter requires regular maintenance to ensure optimal performance and safety during flights.
Additionally, you may encounter issues along the way that require troubleshooting. Here are some tips and guidelines to help you keep your homemade gyrocopter in top condition:
Regular Maintenance
A homemade gyrocopter consists of various parts that require regular maintenance. Here are some guidelines:
- Check the engine oil level regularly, and change the oil according to the manufacturer’s instructions.
- Inspect the fuel system for leaks or damage, and ensure that the fuel lines are properly secured.
- Check the rotor blades for wear and tear, and replace them as needed.
- Inspect the frame for cracks or other damage, and repair as necessary.
- Check the electrical system for loose connections or damaged wires.
Regular maintenance is essential to keep your homemade gyrocopter in excellent condition and prevent accidents during flights.
Troubleshooting
Problems can occur with any aircraft, and your homemade gyrocopter is no exception. Here are some tips to help you troubleshoot common issues:
Engine Problems
If your engine is not starting, check the following:
- Ensure that the fuel tank is adequately filled with clean fuel.
- Check the spark plugs for wear or damage, and replace them as needed.
- Inspect the carburetor for clogs or other issues, and clean or replace as necessary.
Rotor Blade Problems
If your rotor blades are not functioning correctly, check the following:
- Ensure that the blades are correctly aligned and balanced.
- Inspect the bearings for wear or damage, and replace them as needed.
- Check for any damage to the rotor head, and repair or replace as necessary.
Electrical System Problems
If you are experiencing issues with the electrical system of your homemade gyrocopter, check the following:
- Check the battery for a charge, and replace it if it is not holding a charge.
- Ensure that all wires are correctly connected and not damaged.
- Check the fuses and replace as needed.
Homemade Gyrocopter Building Tips
Here are some additional tips to ensure that your homemade gyrocopter is built safely and effectively:
- Double-check all measurements and calculations to ensure accuracy.
- Use high-quality materials to ensure structural integrity.
- Follow all safety guidelines and regulations.
- Test your homemade gyrocopter thoroughly before taking it for its maiden flight.
- Keep all documentation and manuals for reference during maintenance and troubleshooting.
By following these guidelines and tips, you can maintain and troubleshoot your homemade gyrocopter, ensuring that it performs optimally and safely during flights.

Conclusion
Building a gyrocopter at home is a challenging yet rewarding project that requires patience, dedication, and attention to detail.
By following the step-by-step instructions and guidelines provided in this comprehensive guide, anyone can build their own gyrocopter from scratch.
However, it is important to prioritize safety throughout the entire process, from gathering the necessary materials and tools to testing and maintenance.
Always double-check each component and ensure everything is in proper working order before taking your homemade gyrocopter for its maiden flight.
Remember, building a gyrocopter at home is not a project to rush through.
Take your time, enjoy the process, and appreciate the thrill of creating a fully-functional aircraft with your own two hands.

FAQ
-
How difficult is it to build a gyrocopter at home?
Building a gyrocopter at home can be a challenging project, especially if you have limited experience in aviation or DIY construction. However, with the right resources, tools, and dedication, it is possible for enthusiasts to successfully build their own gyrocopter.
-
How long does it take to build a gyrocopter?
The time it takes to build a gyrocopter at home can vary depending on factors such as your level of experience, the complexity of the design, and the availability of materials and tools. It can take several months to a year or longer to complete the construction process.
-
Can I fly a homemade gyrocopter legally?
The legal requirements for flying a homemade gyrocopter vary by country and jurisdiction. It is important to research and comply with all applicable regulations, including obtaining the necessary licenses and certifications, to ensure your gyrocopter is legal to fly.
-
How much does it cost to build a gyrocopter at home?
The cost of building a gyrocopter at home can vary widely depending on factors such as the design, quality of materials, and availability of tools. It is important to budget for costs such as materials, engine, propeller, instruments, and any additional components or modifications you may require.
-
Do I need any special skills or knowledge to build a gyrocopter?
Building a gyrocopter requires a combination of mechanical skills, understanding of aviation principles, and the ability to follow detailed instructions. It is recommended to have some prior experience with DIY projects or aviation mechanics before attempting to build a gyrocopter at home.
-
Can I modify the design of my homemade gyrocopter?
Modifying the design of a homemade gyrocopter is possible, but it should be approached with caution and careful consideration. Any modifications should be based on sound engineering principles and should not compromise the safety and structural integrity of the aircraft.


Leave a Reply